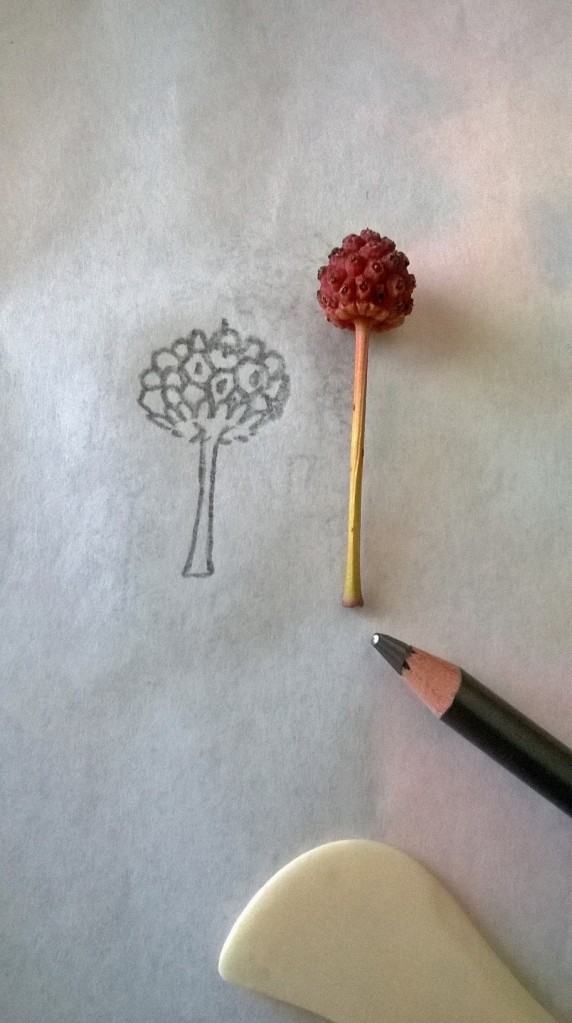
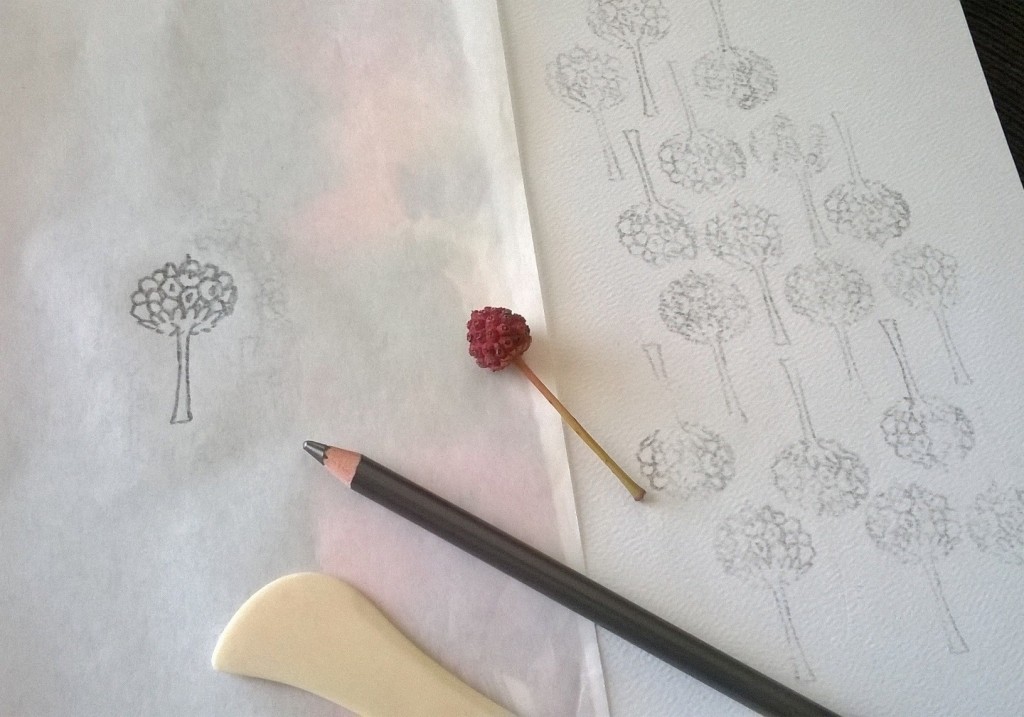
 Here’s a simple example of how to transfer an original sketch onto watercolor paper. Create your sketch on tracing paper in pencil. I used a thick soft pencil. My sketch is of a seed pod I noticed when I came out of a store this afternoon. It was hanging off a tree that was next to my car in the parking lot, and the red tip caught my eye. I thought it was interesting and plucked it up. I only did one simple sketch. My sketch is intended for surface design, and for that, realism is not key here, but rather simplified silhouette and a pleasing shape for a pattern.
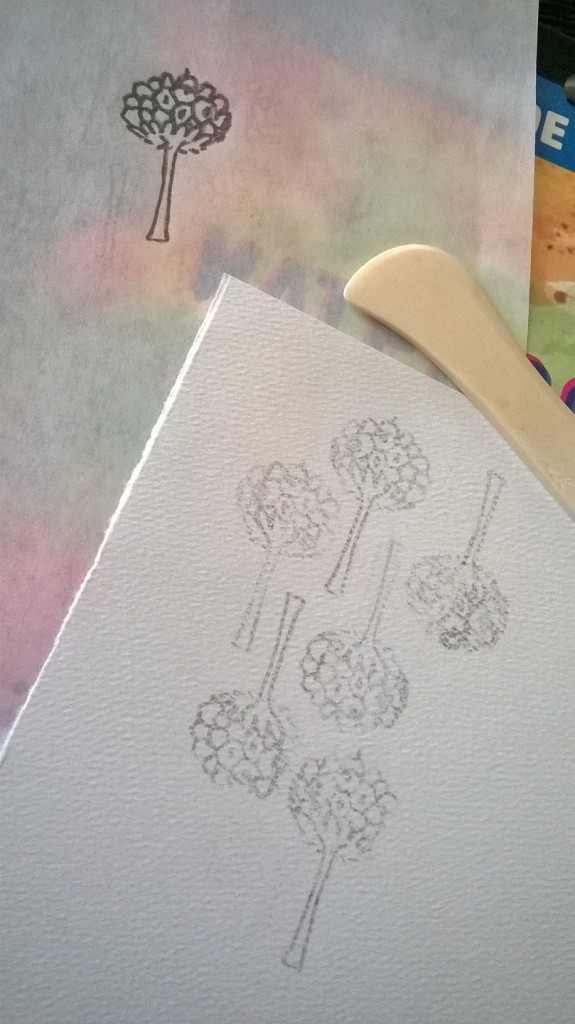
 Once I had the initial sketch on the tracing paper, I placed the paper upside down on top of a piece of watercolor paper. On the side of the tracing paper without the drawing, I used a bone tool to rub the drawing off the tracing paper and onto the watercolor paper. You can use the back of a spoon. Using tracing paper is helpful because you can see through it and look at the design as it is forming on the paper, and decide where you want to place elements.
 The rubbing comes off the paper and creates almost a stamp effect on the paper. You can rub out several more of your motifs onto the paper before needed to go back over the drawing with graphite so that it’s fresh again for additional transfers.

 After creating an arrangement of my seed pod things (if anyone know what kind of a tree this is from, please do tell!), I then took out my watercolor paints and proceeded to “color.” I used only two colors – ochre, red, and a touch of white at the end. After painting the ochre and red, when all was dry, I erased the pencil marks, but because I used a lot of graphite and made heavy imprints, the marks were not thoroughly removed behind the ochre and red. In the red, I liked the graphite giving a little burnished look so I didn’t have to paint in shadows. Doing this differently, for a cleaner more professional look, I’d make the motif larger, use less graphite and lighter “stamps”/impressions, and paint using gouache inside the lines so they could be easily erased.


 This was fun to do and meditative. Now you know how I did it!
Happy Fall!


Wonderful!
LikeLiked by 1 person
Loving this tip and the beautiful art, I have often wondered how I could create my design end pages for my picture book. This would work thank you.
Kath.
LikeLike
Wow, this looks so beautiful!!! And thanks for the very cool idea how to copy a motive!!! Thanks for sharing!!! 😊
LikeLiked by 1 person
Great idea and so beautiful! 😊❤️
LikeLiked by 1 person
Its beautiful and you are prolific!
LikeLiked by 1 person
Beautiful design work here, Cynthia. You have a natural gift for design! 💛 Happy Friday!
LikeLiked by 1 person
Thanks, Laura. I am working on it!
LikeLiked by 1 person
And it shows!
LikeLike
I thoroughly enjoyed reading about the process of how you did this Cynthia thanks for sharing your amazing talent with us!!
LikeLiked by 1 person
Glad you enjoyed, Jodi! xo Thank you!
LikeLike
It’s great to share your technique
Not a lot of people do that
I myself like to do that whenever possible
Great post
As always Sheldon
LikeLiked by 1 person
Loved seeing your process. From humble seed pod to beautiful art…fantastic! Thank you for sharing.
LikeLiked by 1 person
great tutorial! used that method many many times!!! Beautiful image btw
LikeLiked by 1 person
The final piece looks neat – really enjoyed learning about the process.
LikeLiked by 1 person
You know a magician is never supposed to reveal the secret behind their tricks right? Hehe…but I’m SO glad you did!! This is brilliant and I’m loving the end result so much! Magical! ❤️😃
LikeLiked by 1 person
I’m inspired. I love that your eye saw the possibilities in a little seed pod and carried out a wonderful project. I’m going to try this technique so thank you. N.
LikeLiked by 1 person
I love the way the tracing looks like a blockprint. The painted print is wonderful, but I’m thinking you could do a black outline with color and that would be equally interesting. (K.)
LikeLiked by 1 person
I actually tried to outline one in black and didn’t care for the look on these (maybe on a larger size seed pod) and then used the white to cover the black and used the white throughout. That’s how the white got in there! LOL.
LikeLiked by 1 person
Improvisation is key.
LikeLike
Thanks for the fun tutorial Cynthia. Your design is awesome. I stopped by and introduced myself to Amelia today. I explained our association with blogging. She has a very nice shop. I’ll be going back again. 🌺
LikeLiked by 1 person
Super cool, glad it was a good worthwhile trip for you. : ) Nice to hear! xo I’ll be seeing Amelia around the holidays/New Year, so we’ll chat about this, lol!
LikeLiked by 1 person
It’s the seed from a Kousa dogwood (Korean) and I love the art and pattern you made with it! Thanks for sharing the tip about using the boning tool to transfer the drawing!
LikeLiked by 1 person
OMG, so glad you knew what it was!! Teresa, my new best friend. Kousa dogwood – a Korean plant in Pennsylvania. Love it!!! Thank YOU!
LikeLiked by 1 person
LOL! It’s nice to be your best friend! 😀 I actually know a lot less about plants and trees than my husband and sons, but I knew this one. We have one on our property. The fruit is decent tasting. The squirrels especially love it. 🙂
LikeLiked by 1 person
It tastes good? I only took one pod. I would like to eat it, but … hmmmm.
LOL! So funny. I am smiling. So smiling from you today…
LikeLiked by 1 person
Glad I can make you smile! 🙂 It doesn’t taste too bad; I’d eat it if I had nothing else to eat, but it’s not something I’d seek out. LOL!
LikeLiked by 1 person
NOW I am laughing! LOL! So funny. I’ll pass. Let it dry out and just look at. I’ll put it in my glass dish with the acorns, more squirrel food. Have a good night, my friend!
LikeLiked by 1 person
😀 That’s a good idea! You have a great night, too!
LikeLiked by 1 person
Awesome idea, thanks!
LikeLiked by 1 person
What a great idea! I’m thinking this would be so pretty as a background for some hand lettered quote in bold black brush pen! Very cool!
LikeLiked by 1 person
Oh, must do that next ! Cool!
LikeLiked by 1 person
Very nice and cool idea! Looks beautiful!
LikeLiked by 1 person